pokegirlforever
<-- Too cute for ya!
I recently started recolouring on Microsoft Word and showing it on my art thread, and people have been asking how it looks so like the origional. So I've decided to do a tutorial thread on how to do this.
NOTE: You can only do this Microsoft Word 2010. I have tried with older versions and it's not possible.
Firstly you must choose what picture you will want to do and what parts you will want to recolour when the time comes. I have decided to go for weavile card pack from diamond and pearl secret wonders.

Once you have chosen you'll want to copy and paste the picture and make it so one is in front and the other is behind. This is so that you'll be able to overlap them. It's kind of like having layers in GIMP or Photoshop.

From there click on the forward one as your be modifing that one. Double click on it and go to the top corner and select this icon.

From there you'll be able to select what parts you won't want to be recoloured and what parts you will want to be recoloured using these buttons.

(Note:Word sometimes changes odd bits by itself so be careful)
Once you have added/deleted the parts it should look something like this:

Click away and then double click it again. Go to the top corner again and using the icons next to the remove background icon you'll be able to change the colour.
The icons-

Depending on what you want to change depends on how many copys you make. You can only change each copy to one colour so you may have to make several like this-

After that is done slide them top of each other and there you go! Unforunatly you won't be able to copy these on to paint to due to the way they were created however screenshotting works just as well as copying would.

And here is the final result!
Normal-
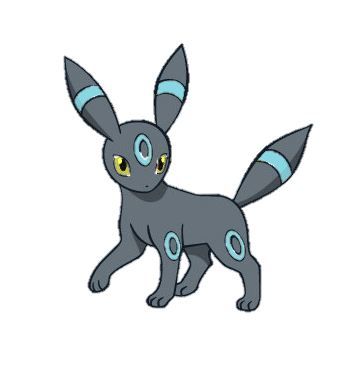
 Recolour-

Here is another few examples-
Normal-
 recolour-

Normal-
 recolour-

If you want to show me your results or ask any questions just post below.
NOTE: You can only do this Microsoft Word 2010. I have tried with older versions and it's not possible.
Firstly you must choose what picture you will want to do and what parts you will want to recolour when the time comes. I have decided to go for weavile card pack from diamond and pearl secret wonders.
Once you have chosen you'll want to copy and paste the picture and make it so one is in front and the other is behind. This is so that you'll be able to overlap them. It's kind of like having layers in GIMP or Photoshop.
From there click on the forward one as your be modifing that one. Double click on it and go to the top corner and select this icon.
From there you'll be able to select what parts you won't want to be recoloured and what parts you will want to be recoloured using these buttons.
(Note:Word sometimes changes odd bits by itself so be careful)
Once you have added/deleted the parts it should look something like this:
Click away and then double click it again. Go to the top corner again and using the icons next to the remove background icon you'll be able to change the colour.
The icons-
Depending on what you want to change depends on how many copys you make. You can only change each copy to one colour so you may have to make several like this-
After that is done slide them top of each other and there you go! Unforunatly you won't be able to copy these on to paint to due to the way they were created however screenshotting works just as well as copying would.
And here is the final result!
Normal-
Here is another few examples-
Normal-
Normal-
If you want to show me your results or ask any questions just post below.
Last edited:

")